|
This seems to be part of the restoration process that just goes on and on without that much actually happening. Again this months work started with me covered in dust wearing a dust mask. There was one bit of success though. In recent months I have been buying cheap sanding disk from either Wilkinsons or Halfords, simply because they were both convenient shops to visit and they were the only disk they had. Over the weekend I ran out so drove around to the local B&Q superstore to buy some. They had no el-cheapo ones (5 disk for £0.99) but a set of 5 Black and Decker Piranha ones for £2.68. Still cheapish I hear you say ... any way these things are fantastic. They seem to sand and sand and sand without getting clogged up, wearing down and flying off the drill like a broken Frisbee. I wish Id brought these to start off with now. So, any one about to buy sanding disk for a similar project - they are the ones Id go for!
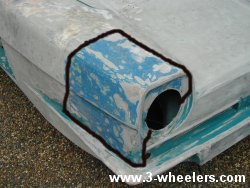
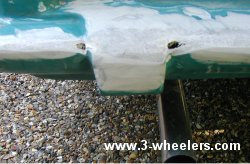
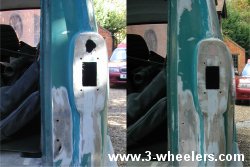
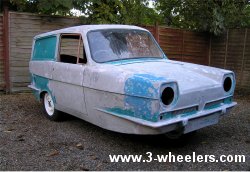
Sanding the body I seem to be finding several areas where the fibreglass is so thin that you could almost push your finger through. At first I thought this was because Id been a bit heavy handed sanding with the drill but the fibreglass in the area just behind the rear door hinges was the same. So using P40 for some places and fibre glass matting for others, all these weak areas have now been strengthened. A number of holes of also been filled that I found in the rear bumper and also the mysterious one that was sitting behind the drivers side rear light cluster. I have gone over the whole car looking / feeling for dips and sunken areas and used body filler to help bring them level with the rest of the body.
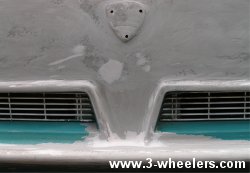
Now that the drivers side is almost totally stripped of old paint you can quite clearly see how the body has been repaired in years gone by. A large section has been added to the front with a smaller section fitted in on the back bumper. It was also whilst sanding off the paint that I noticed how similar to a new Vauxhall the area directly under the front badge looks.
With all major repairs complete and all star cracks sanded out the car is now ready to start priming. There are places I have left the paint on and this is because the paint in these areas is quite sound. If it was not for all the cracks and damage, then chances are I would not have sanded the car as much as I have.
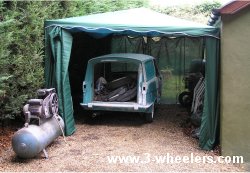
As winter is approaching rapidly I thought I could do with a better cover than the cheap one I have now, especially if the car has to sit under it with fresh paint. So, after a quick visit online to ebay I came across a 3m x 4m gazebo which the car is now parked under. Hopefully this will make a good cover throughout winter and provide a paint shop if its raining outside.
Go to page 2
|