|
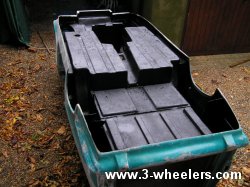
You know how you wake up with one set of plans in your head and then some one e-mails you and suddenly all those plans fly out of the window and new ones appear. Many of you may know of Uncle Frank from California who has a grand knowledge of building all things that are weird and wonderful on wheels. Whilst talking (well OK, e-mailing) about my paint plans he asked a very valid question ... are you painting the underside of the body so that it seals the fibreglass ... and so helps stop the paint going dull. I wasnt but I thought is that why all Reliants go dull after a few years? Fibreglass is porous and so in bad weather its soaking up damp from underneath. Well that was that, whilst taking on board Uncle Franks tips on how best to paint the car, I e-mailed my brother and said, Bro, can you get several cans of Tetra-Shultz on your way down - we are going to paint the whole underside.
Now those of you who read the last instalment will know that I brought a gazebo off ebay to act as a paint shop. Well I tied it down, nailed it down and pegged it down ... what I didnt do was account for the huge ocean that was going to gather in the top and bring the whole lot down. My brother and I pegged it back up, used garden canes as rafters and broom stales as splints to hold the broken poles together. It was back up again; however, some one up high was bored and thought, lets make it rain all day, in fact lets make it rain and rain and rain. Luckily we we up bright and early before this said person was bored and so we managed to roll the Reliant out, remove the body (we hadnt bolted it down yet) and push the chassis into the garage and the body into the gazebo. The body lay on every side and upside down as my brother sprayed every fibre glass orifice to ensure that the underside was completely coated and water proofed.
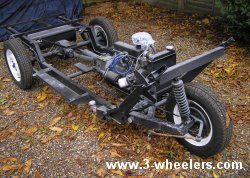
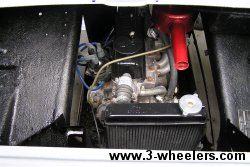
Meanwhile I surveyed the chassis, it had turned grey. Fortunately unlike the grey in my hair, it was just a case of blast the whole thing down with air. As I was cleaning up the engine so that it was bright and shiny again I noticed a horrible copper coloured growth on the steering arm ... it was rust. Whilst Ive been busy working on the body over the last few weeks, rust has secretly been nibbling away at my steering arm. But not for much longer, with a quick sand and two generous coats of Hammerite, it is now shiny and in keeping with the chassis. I should have painted it when I fitted it really, rather than leave it as bare metal. This is one bad point about the project living outside, but then its good because as a result I can see these areas and treat them before the body finally gets bolted down.
By now the rain was hammering down and my gazebo was leaking everywhere. The underside was painted, the chassis all cleaned up and so we had a go at fixing a Lucas alternator I recently purchased. It doesnt fit. Its a standard alternator fitted to later Reliants but the engine plate must be slightly different on those. We need to get an angle grinder to the plate and just touch it so that the alternator lines up flush with the mountings. We never had it with us so that will have to wait until next time.
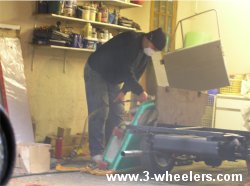
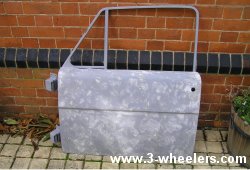
So with all that done we decided to prime the doors and bonnet. As it was still raining it was gas mask time and spray them in the garage. After they were sprayed they looked great ... until you saw them up close and every single mark from the sander was now apparent and stuck out like a sore thumb. I got hold of the passenger door and spent ages covering squillions of dents with body filler and then sanding them down, re-spraying and then refilling all the ones that still stood out. By the third attempt at filling, sanding and priming the door looked a lot better with just a handful of marks that still need treating.
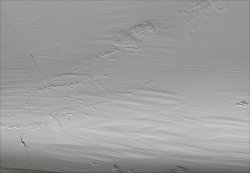
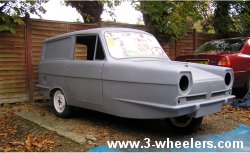
Retiring for the night we were up bright and early again next day. Despite the torrential rain that now seemed to be charging around the country attacking peoples washing, for us the sun came out and there was not a cloud in the sky. So we rolled the body out and then painted the whole thing with primer. When it was finished it looked fantastic ... from a distance. As soon as you get up close the body work looks pretty bumpy, which is a shame as I thought Id done such a grand job of sanding it all flat.
We got to the stage where we couldnt really do that much more and so before putting the car to bed for the night, slotted the doors back onto the vehicle. It looks great and its actually a pity I didnt choose grey for the models as grey really suits this car.
I had planned to spray the body a couple of times with primer and then start to paint it in early November before Jack Frost makes an appearance. Unfortunately the body will require a lot more work in getting it flat and smooth prior to painting ... and just when I thought I was winning!
Elvis Payne,
October 2004
Go to Part 11 November
|