|
Having a week off work in April proved to be a bonus as I got quite a lot of work done. Not with the chassis though, but in cleaning up old parts and trying to source new bits that had crumbled away or seized with such a vengeance that Hercules himself would have needed help. Its not until you take a car apart that you realise just how many bits are in it, and then just how many bits make up one big bit. Im not sure if anyone has ever worked out how many components make up a Reliant Regal but its lots ... but then I guess no where near the amount found in a modern car with lots of gizmos like ABS, PAS and Climate control etc.
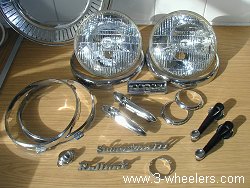
Wondering where to start I went for the easy option - all the shiny bits. These included headlamps and chrome rims that have been sourced from a Reliant Robin as whilst the Regal outer chrome rim is larger (and so needs securing with a locking screw) the Robin headlight unit appears to be exactly the same size but has a slightly smaller chrome rim that clips on. Thanks to my brothers old parts bin, I also have chrome hinges for the bonnet and new chrome rims for the indicators. My brother had a Regal van quite a few years ago that he converted into a trailer but he luckily kept a lot of parts from it.
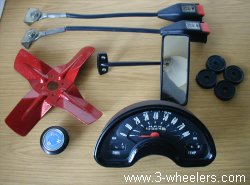
The speedometer was pretty well rusted at the back but after taking it all apart, cleaning it up and repainting the dials it looked as good as new when I finished. The fan blade and air filter ended up Nightfire Red. I thought Id paint the fan blade red and the only red paint I had was metallic touch up paint from my Rover. The fan blade looked like glass when I finished so after carefully masking of the original sticker on the air filter, I sand blasted that and painted it the same colour.
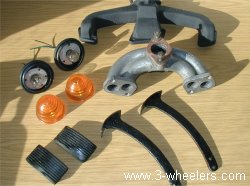
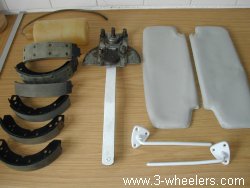
Lots of other parts also got sand blasted or just wire brushed and repainted with either a rust killer paint or primed and then painted. I'm not sure why but I even painted the brake pads and gave the pads a slight sanding down. When everything else looked so clean I had to really.
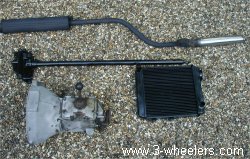
The exhaust is suprisingly strong with just a small hole at the back where the water has run off the body and dripped onto it. My brother found an old stainless steel tail pipe from a Truimph Stag that had been dumped and so after sawing off the tail pipe from the Reliant exhaust he welded the Triumph Stag tail pipe on to it. It looks quite good to. Its nothing like the giant baked bean cans some folks seem to use on their cars as exhaust, but its a bit thicker than the existing Regal tail pipe that looks somewhat like a gas pipe. The exhaust was then painted with a heat proof paint.
The radiator on the Regal held water OK but the supports had pretty much rusted through. A welding job could probably fix it but my brother had an old Robin radiator that looks almost new. Its a different shape to the Regal one but has the same hose set up and the same brackets for fixing. His collection of spares also sourced new inner electrics for the front indicators as again the old ones were well and truly rusted.
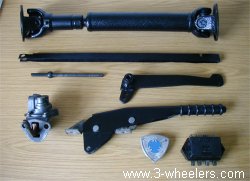
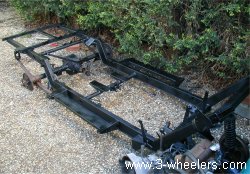
The Regal badge on the front didnt look happy at all but after looking at it I discovered that its clear plastic. Therefore I scraped off all the old paint and repainted it from behind silver and blue. If you look at it carefully you can tell that its not perfect but from a distance it does the job ... and going by the price recent ones have fetched on ebay, it saves some money to. Talking of painting, the chassis has also been sprayed with a second coat of Tetra Shultz. My idea is to have a thick rubber like layer thats actually 3 layers thick. I have heard that some chassis painted with things like Hammerite can chip if the paint its hit by a hard object (ie stones). I'm hoping with Tetra Shultz that the said object will bounce off or if it does cause damage, just take off the top layer.
This month I have also sourced parts from where ever I could find stock, Carwise Reliant Spares, Bond Spares, Stirchley Reliant Services, Richard Plaxton, Duncan Bradford and my brothers parts bin have all been great sources for bits. Most of these items have arrived by post and my poor old postman has been up and down the road carrying parcels. I have told him that Im building a Reliant Regal by post - maybe I should have mentioned that the next parcel will not contain an engine, chassis & body!
Elvis Payne
April 2004
Go to Part 5 May
|