|
As April begins the term April Showers is truly apparent. One second the sun is shining and the birds are singing away quite happily and then the next its absolutely chucking it down with rain. Its a race to get all the tools inside before the rain gets to them and no sooner have you done that the sun comes out again. Anyway, Geoffs welder is now fixed and his Co2 bottle is full and so whilst he finished welding the chassis up, I took apart the door on my Rover 623 to fix my electric window, as it kept sticking half way down.
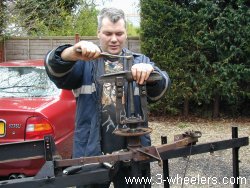
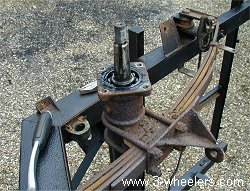
Once the welding was done a new mounting bracket for the A frame was also created. To help give it strength, rather than drill a hole for a bolt to pass through, we have welded on a stud that a bolt can be fixed on to. To us, this seems a lot stronger. The chassis was then turned on its side and my brother dug out his pulling tool to remove the hubs on the axle. Initially we clamped it on and it required some serious force. We then discovered an easier way. Putting the chassis back on the ground with the extractor clamped to the rear hub Geoff was then able to put more force behind the spanner. A few seconds later with a huge pop, the rear hub came flying off. We were then able to remove the brake plate etc and get those all cleaned up and at the same time replace the outer oil seal in the shaft. A set of these were sourced for me by Richard Plaxton from BSL. As the bearings are fine we decided to leave those alone and not change the inner seal. As the old seal was very brittle and that squeezing it just snapped it in half, we decided to pull the hub on the other side to and replace that oil seal. This one however was a lot more flexible.
With the oil seals fitted the Tetra Schultz then came out again and both the A frame and front of the chassis were treated with it - once the chassis had been sanded down again. Its amazing how much surface rust can accumulate on bare metal in four weeks. Before the body goes on, I plan to give the chassis at least another two coats. During the week I had bought a set of new A frame bushes and mounting caps along with a set of bushes and steel innards for the front suspension from Bond Spares. The club sells new parts for those restoring Bond Bugs but luckily as a Bond Bug is essentially a Reliant Regal underneath many of the mechanics are identical. Ironically on the same day my brother also brought a set of A frame bushes from Reliant Services in Stirchley but they were great and gave him a full refund when he took them back. The first thing that amazed me with the new bushes was how small they looked. I thought I had the wrong size bushes at first until I realised that the old ones have just been worn and crushed to their present size. Once the Tetra Schultz was dry we set about rebuilding the A frame. It wasnt a hard task but then we pondered at what a horrible task it must be if the body of the car was still on. We had the chassis on its side when we did it.
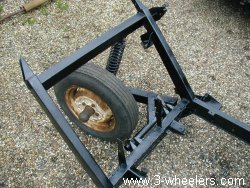
When it was back together we checked for any play in the front wheel. There is no play in the King Pin but there was play in the wheel bearings. So we took off the front wheel and proceeded to remove the hub cap covering the bearings etc. We removed the locking screw and tried to remove the cap. Would it come off? We twisted and turned, tapped and bashed, pulled and poked and the thing was stuck solid. So fearing there must be something else holding it on I dug out the Haynes Manual for the Regal. That simply said, unscrew the retaining screw and remove the hub cap. Well we did, but the cap wasnt having any of it. After a few more minutes with a screw driver and a very large hammer the cap finally came off. Inside we discovered that the main hub nut was loose. Once this was tightened we lost a lot of play in the front wheel. There is a tiny amount thats just detectable, but Im not sure if its enough to worry about.
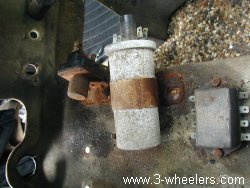
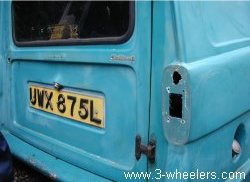
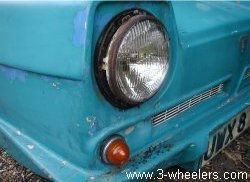
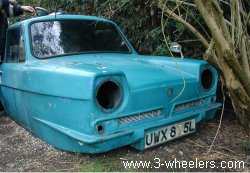
As the rain now started to pour down again we immediately started to put all the tools into the dry and cover the chassis. We did it just in time as this time it poured down and added to that the wind was terrible, smelly to - I havent a clue what Geoff had been eating the night before!!! We couldnt do much more to the chassis and so turned our attention to the body and the engine. First of all we removed anything that was clamped to the body in the engine bay like solenoid, fuse box and coil etc. These were so rotten that they had more or less welded them self to the body and whilst a few came undone, we took an axle grinder to the bolts on the fuse box. I then tried to unscrew the rear lights but the bolts were so badly corroded I had no chance. As the lights are being replaced I decided to just break the glass of and Geoff took an angle grinder to the remaining bolts. Mysteriously once removed the rear lights on the drivers side have an additional hole behind them? Why this is we havent a clue, its a rough hole that doesnt appear on the passenger side. I then set about the headlamps and they were just a pile of glass and rust. As I loosened the screws, fragments of rust would just fall out from behind the headlamp like sand. The bowls behind the headlamps are totally rusted and so as these are sealed units, the headlamps are useless and got dumped in the bin. The front indicators were OK, but these are covered in a large rubber shroud.
On the engine Geoff pulled off the gear box and whilst we need a new thrust bearing the clutch itself looks good and Im not sure we would get a much better one if we brought a new one. A number of other parts (carburetor, manifold, fuel pump & water pump) have also been removed ready for cleaning. I will get these done before starting on the engine itself.
Go to Page 2
|