|
Another weekend and again the sun shone, this was surprising as during the week we had torrential rain and indeed flash floods were reported throughout the UK. Now the body is on the chassis it makes it a lot easier for me to manoeuvre and so I can move it around freely to work on. Armed with a dust mask and a sander I decided that I would take the damaged areas right back to the damage, in effect deleting most repairs from the past. The two areas that really concerned me was the roof and the drivers wing. (Now I have a replacement drivers door that worry has vanished).
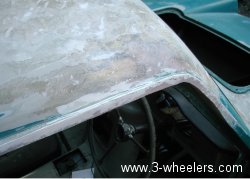
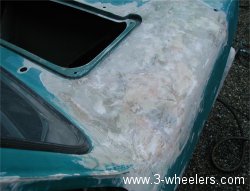
On the roof I sanded it right back to the damage and to the steel support that runs through the body. The steel section was very rusty but still quite solid. I pondered coating it in something but figured that once I fibreglassed over it this would keep the water and air out and that anything I put onto it may react with the fibreglass. Once sanded the area now actually looked a lot worse, especially with a lump of steel sticking out. Digging into my fibreglass sack I cut a rectangular piece of fibreglass mat out and shaped it over the repair and then mixing up some resin painted that over the top and pushed it all into the damaged area. I let that set and then mixed a tray full of Isopon P40 (fibreglass matting in a tin). That was great stuff as you could just push it where you wanted and best of all it sands down really smooth and so you dont really need filler afterwards. I built the roof up in a couple of layers and each one had a slight lip that enabled me to create a new rain channel over the drivers door. This involved lots patience sanded, added small amounts of P40 and sanding again until at last I had a new rain channel and a rock hard repair to the roof. The rain channel isnt perfect though as I still need to add a small grove inside it for the water to run through.
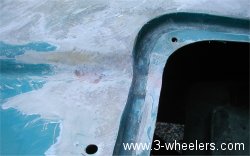
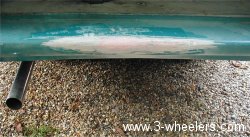
I then attacked the front wing and took that back to the original damage and again that suddenly looked quite horrible to. As with the roof I added a layer of fibreglass matting to strengthen it and then used P40 to smooth the wing out and make the repair flush. Again like the roof after lots of sanding it has come up really smooth without the need for any filler. (When I paint it I will be using one of those paint primers that fills slight blemishes) The fibreglass near the engine bay was also very thin and so this has been reinforced to.
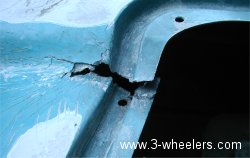
Talking of the engine bay there was a large crack in the side of that and so I cut it out and taping over the gap fibreglassed it from underneath. Its surprising how well that technique works, Ive never tried it before. I had to fibreglass on top a little bit to but once sanded down it did the job. Enjoying my new skill (I use the term loosely) of cutting things out I then cut a section out of the back bumper. Again taping over the hole, I fibreglassed it from the back and it made a great repair. Once it was all sanded down you could not tell that I had cut it out ... though I kinda guess thats the whole idea!!
After that I was going round the car sanding out cracks and boy are there a lot of them. Worst still is that its amazing what the paint is hiding. You can sand an area that looks OK and suddenly body filler falls out leaving a hole. Any holes I find though are being filled with P40 rather than body filler as being fibreglass thats not going to crack like body filler can and in addition, it appears to be a million times stronger.
Elvis Payne
August 2004
Go to Part 9 September
|