|
Like May, June was a busy old month doing this and that and so work on the Reliant was not too dramatic. My first job was to try and remove the broken stud on the water outlet at the top of the engine. After buying a pair of mole grips I set about the bolt. Grips firmly on and a liberal spraying of WD40, I started to turn the bolt .. or so I thought. I few seconds later it snapped off level with the engine. So after digging through my tool box and finding a sharp drill I decided to drill it out. I drilled a small hole, put the water outlet branch back on to make sure it was in the right place, it was, and so I drilled away. When the hole looked deep enough I carefully removed all the swarf and put the water outlet branch back on. Bugger! The hole was in the wrong place, some how it had jumped slightly. I figured as I drilled the hole smaller than the bolt I could just drill next to it. Seemed a good idea - but then my drill bit snapped and so that put paid to that. (Dont worry, the engine looks a bit exposed in the photo but it was all well covered whilst I drilled).
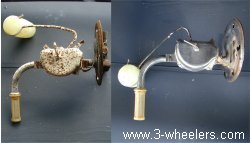
Stumped on that job I decided to investigate the sender unit for the petrol tank. My brother had drilled the through the screws on the old one to get it out and when he did it looked rather rusty. Whilst at the Reliant Owners Club National Rally in May I overheard a lot of people trying to source this part and so realised its not something I will replace easily. So after taking it carefully apart I realised that there isnt actually that much to it and whilst the exterior looked rough, inside it moved freely and was OK. So after a good sanding and clean up, I removed all the rust and it looked almost new. So I have refitted it and in all honesty can not see any reason why it shouldnt work. Im not sure I like the idea of the fuel filter being inside the tank so will fit one externally that can be cleaned easy.
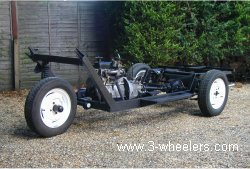
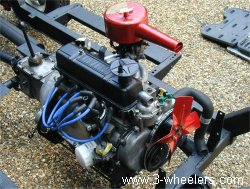
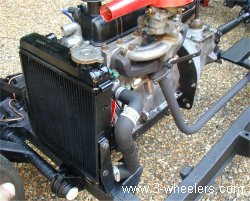
After rebuilding the hand brake assembly and bolting on the prop shaft I took the rocker cover off, put the gearbox into 4th gear and then pushed the whole chassis forward. As I did all the rockers etc went up and down as they should and they was a pleasing sound of compression from the pistons. Then I set to work on the engine again. The old water pump had a bit of play in it but luckily John from Carwise Reliant Spares was able to supply a new one. The was then mounted and the fan blade screwed on. This is now Nightfire red and bears no resemblance at all to the rusty lump of metal it once was.
The old radiator held the water OK but the sides were very rusty and were starting to rot though. Whilst it could have been fixed with a bit of patience, my brother had a spare radiator that was almost new from a 1976 Reliant Robin and so it made much more sense to fit that. The Robin radiator is a slightly different shape to the original Regal one as the Regal one slopes down to one side at the top, but I can not see how it makes much difference. It makes more sense to use a better one. The radiator hoses were starting to crack and so I have new Kevlar Reinforced ones from Bond Spares. They do seem considerably thicker than the originals.
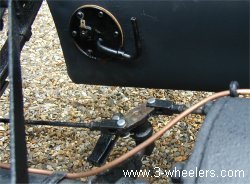
I then got to a stage where I couldnt do much more as my brother has the starter motor and I could do with his helicoil thingy to finish the job off with the water outlet branch. So decided to put the HT leads on, before I pulled the old ones off I took a photo - just so I could see what the firing order was.
As if to confirm end of play the rain started to pour down so I quickly got everything put away and covered up. I think the next job now is to finish a couple of bits on the engine and then fire her up and see how she ticks over ... and indeed see if I have introduced any oil leaks by taking things apart. Ive always used new gaskets so it should be OK.
Elvis Payne
June 2004
Go to Part 7 July
|