|
As the month flew by, every weekend was spent on the car, Sue at the moment really is long suffering as I vanish in the morning, appear when Im hungry and then vanish again only coming back in when a) The new series of Dr Who is about to start or b) Its getting dark. I really want to get the car finished though for the end of May for the National Reliant Owners club rally and so I have had to spend as much time as I can on it. In addition to this I am also writing a book about the restoration that has to be with the publishers for the end of June - another reason to get my skates on and get it complete.
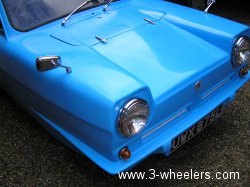
I got very depressed about the paint work at one point when I parked the car under a Horse Chestnut tree. I went in for some lunch and came back out to find sticky sap and buds all over the car and it actually marked the paint work in places. Luckily when I had the paint mixed I had a large spray can made up as well but I do not think I shook it long enough as when I touch up some of the areas after cleaning them down, the spray paint looked a slightly different shade. So waiting 2 weeks and then armed with some water and 1500 grade wet and dry I gave the whole car a good rubbing over and the polished it up with some Meguiars Scratch X fine scratch and swirl remover. The results were quite outstanding and after then buffing it up further with some Harly wax the shine was superb, indeed even Sue stopped and said wow thats really shiny. There are still a few areas that could benefit with a bit more polish but happy with the results I thought I spend more time on that later.
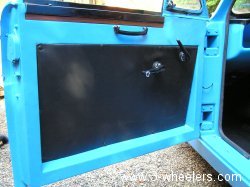
In part 1 of this update I painted the back of some hardboard black to make door trims. They looked OK but when Sue saw them she said they looked horrible. I said they are OK but after a shopping trip Sue came back and said, I saw this in Marks & Spencer and with that she unwrapped a metre of black leatherette. So the door trims came off and were trimmed in black leatherette and screwed back on again. The result was well worth it and they do look much better now.
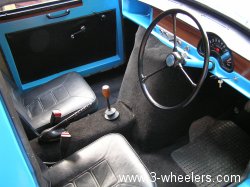
The interior also received lots of new carpet. I managed to buy a huge roll of black Rover carpet off ebay really cheap and that looks great in the car. The original carpet I had for around the engine bay I kept as it was thick soundproofing but when I came to fit it I realised that it was the wrong size and must have been out a Regal Mk V or IV. I tried to get another but couldnt so in the end had to cut the one I had up to fit and then cover it with new carpet. Originally the seats were fitted over the carpet, I unbolted the seats and fastened carpet under them and then added a second piece in the foot wells so that I can take it out if need be. I also found a walnut gear knob with a blue Reliant logo in the centre that Derrick Smith gave me years ago and so this looked great once attached to the gear lever.
In the back of the car I have not put the rear seat back as I never plan to carry folks in the back and as my front seats are so far back they wouldnt have any leg room anyway. Instead I have cut a large piece of hardboard to cover the whole floor and made it hinge so that I can keep spare bulbs etc under it in the floor recess. This has been covered in black carpet and so nicely matches the front of the car. The interior of the van (in the back) never got painted and is still as it was when I had the car. It is the original Reliant finish and so I thought I would leave it as it I paint it and then carry stuff it may get scratched and look horrid. Presently the finish doesnt really scratch and so is much better.
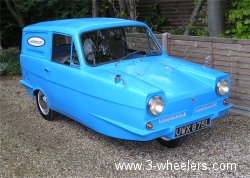
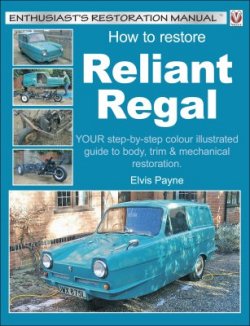
As many of you will know I have also been writing a restoration book as I have been going along with this project. This will be a restoration guide for all Regal 3/25 and 3/30 models and as well as featuring many photos of my restoration (hundreds that have not been shown in this online update) it also features a few other Regals to. For more information about the book please click the cover to go over to the publishers web site. The observant amongst you will notice that the bottom photo is actually a shot of the car before restoration. This is because at the time the contract for the book was signed I had no completed restoration photos - as the car wasnt complete. This cover therefore is just a demo cover and the actual one should feature a restoration complete photo.
I have very few jobs to do now so fingers crossed by the time the next update appears the restoration will be complete.
Elvis Payne
April 2005
Go to Part 17 May (2005)
|