|
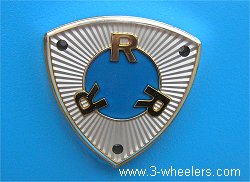
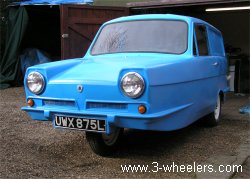
Whilst chomping away on a bowl of Cornflakes and sipping my tea, I gazed out of the window and said to my girlfriend (Sue), It looks like a gorgeous day today. So putting on my work things I get outside, unwrap the car, breath in a huge breath of fresh air ... and it starts to snow. Quick as a flash I push everything under cover and it stops, so I bring everything out again and 10 minutes later it starts to snow again. The whole weekend was spent pushing the van in and out of cover as it snowed, then rained, then shone glorious sunshine before snowing again. This week I had some vinyl transfers through the post for the back of the van from Sign & Print Graphix. They have been made almost identical to the ones on the model with the exception that I have had the 3-wheelers.com writing in black rather than silver as it appears to be a lot clearer. Sue was all set to help me stick them on incase I needed an extra set of hands to hold things but I decided it was too cold to apply them and the constant snow showers was not going to help. So they will go on when its a tad warmer. In a moment of freezing madness I did temporarily attach the front badge and number plate to see how things will look, it looked great to me.
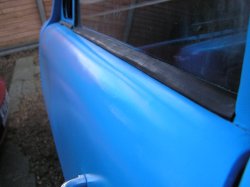
I have been stuck on the passenger door as I needed a Reliant Robin window seal to cut down for the door. (Im using those as unlike Regal ones they cant rust). As soon as John Copestake heard of this he very kindly popped one in the post for me so I was able to rebuild the passenger door. That just needs the quarter light window and door panel adding now.
I am also having many flashbacks to my Reliant Robin days as I try and get my shovel like hands through tiny gaps and around four corners tightening bolts with one finger as another holds things steady. As a result (along with grazed knuckles and maybe a few rude words to) all the pedals are connected up and the throttle (again thanks to John Copestake for the cable) along with the choke cable and the handbrake cable. The latter seemed about 1/2 inch too short but after a bit of brute force it soon fitted. The hand brake certainly works to, as I found out when I went to push it with the hand brake on. Connecting the pedals, I pulled up my Rover and using jump leads starting the Reliant up again. It was really cold and took a few turns but once it was warm it ticked away quite happily. To test all the pedals I tried putting the car into first and pulling off and the reverse. I could only actually drive about 10 inches else the jump leads would have pulled off. First gear and reverse both went into smoothly and the car moved forwards with no jerks what so ever. I must buy a battery this week so that I can take the car for a test drive through a couple of gears.
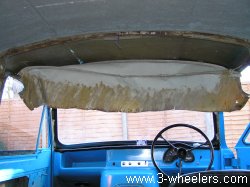
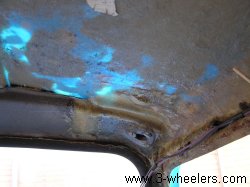
Inside I decided that Id strip the headlining and was most interested in seeing how its fixed on. It has poles that run through it and the slot into little wire things pop riveted to the top of the door. Once the lining was off I instantly noticed the front corner where all the damage was on the outside. The sun was shining through the roof bright blue so I figured that this may be pretty thin. So grabbing a few sheets of thick fibreglass matting I applied them all around the once damaged area to reinforce things.
The heater stand has now also been remade and painted. Attaching the studs were quite a task with a welder but my dad soon fixed that one and welded them for me. The heater was also taken apart and restored as best I could. The February update as a whole seems to have brought the whole project on leaps and bounds so hopefully the car will be on the road for the next Reliant Owners Club National Rally at the end of May 2005. This has been my target all along.
The body still needs a good waxing to seal the paint and hopefully get a good shine, though I shall do that last so that once the interior is done. My brother has helped lots, my dad has helped lots and so has my girlfriend ... now I need to be really nice to my mum and see if she can make me a new headlining ... hmmm that will be an extra extra large box of chocolates for Mothers Day then?
Elvis (& Geoff) Payne,
February 2005.
Go to Part 15 March (2005)
|