|
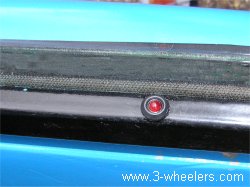
It was one year ago that I collected the car and here it is 12 months later on the homeward straight of restoration. The last major job is rewiring but I havnt got a clue how you start that so until my brother arrives its a case of build up all the bits I can do. My first task was to start on the doors and instead of using the Regal silent channel along the side windows I am using a rubber Reliant Robin one cut down to shape. Unlike the Regal version the Robin one doesnt rust. Whilst rebuilding the door I have also inserted a small flashing LED into the top of the door. This will be linked to the car alarm and means that like my Rover, the doors will flash when the alarm is armed. Rebuilding the quarterlight window was quite a task trying to get the glass and rubber seal into the frame. In the end I cheated and dispensed with the rubber seal and used a large bead of silicone sealant instead. Ive noticed that the quarterlight window doesnt stay open so I may need to doctor it somehow so that it does. Unfortunately the design of the door means I cant get at the pivot from inside to make the whole things a bit stiffer. One thing that many folks do not realised is that above the door level the whole window frame has a felt lining so that the glass slides along material rather than metal.
Door handles have now also been added which is great, it saves keep poking my finger into a tiny hole to open them. Whilst I have added the door handle to the both sides of the vehicle, I could not progress much further with the passenger door as the second Robin window seal is damaged. Therefore I need to source another old one before I can complete the door.
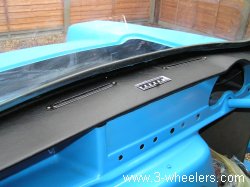
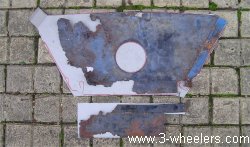
A while back I bought a new dash cover and so thought I may as well use it, so peeling off the old one the new one was stuck into place, closely followed by a polished chrome ash tray and heater vents for the windows. Talking of heater vents, those of you who can recall the February 2004 update will remember that the heater base was completely rotten. After finding an old scrap metal door off a printer cupboard, this was cut to size and then bent into shape. Its a little bit thicker than the original but alas it does the job.
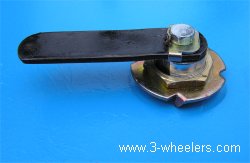
Finding a Regal bonnet (hood) lock has been quite a challenge until I discovered the Rialto ones are very similar. The lever arm is smaller on the Rialto lock and so taking the arm off the Regal lock and bolting it onto the Rialto lock gave me a band new Regal lock.
The hand brake lever has also been bolted into place (though the cable seems to be about an inch short). I can now see why Reliant attached the hand brake lever before attaching the body to the chassis as it is a fiddly job. In the end I had the hand brake back plate under the car and hoisted it up with wire so that I could get bolts into it from inside the car. It was a bit of a balancing act but I got there in the end.
One thing that did surprise me is the amount of little marks you can see when bright sunshine hits the car. In normal day light the body looks spot on, but when bathed in bright sun light, its surprising how many little flaws show up. I know though that I could have spent forever sorting them out so I guess you have to draw the line somewhere.
Go to page 2
|