|
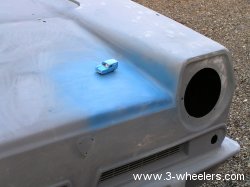
Happy that the body was now 95% blemish free, my girlfriend and I trundled off to the local Auto shop to see what colour paint we would need for the car. It seemed that showing them a 3-wheelers.com model and saying, Can you mix this colour? didnt help and so we had to go through a rack of car paint looking or the closest match to the model. We then found one, Ford Wedgewood blue. On the cap it looks one thing but on the body another and so I brought a can and sprayed a small section on the front of the car. Next to the model it seemed a very good match.
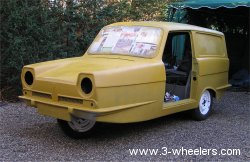
To help give the paint a good finish I brought a couple of cans of filler primer and sprayed the car, until now I have been using my brothers air compressor and his spaying tools. The first thing I noticed about filler primer is that its yellow. Suddenly I had a yellow van and resisting a moment to write Trotters Independent Traders on the side of it, I again attacked the side with spot putty - I am now on my 5th tube of the stuff. After more sanding down and another coat of filler primer the car looked great. The wings looked flat and smooth and there wasnt a blemish anywhere. Fantastic I thought, I can start painting it soon. Rubbing the body down with wet and dry, I resprayed the body again with grey pimer as I figured blue would sit better on blue than it would yellow.
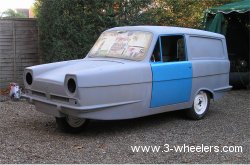
After another light rubbing down I decided that I would spray one of the doors first. Full of excitement that it was now painting time I cleaned the door with a tack cloth and gave it a coat of blue. It looked superb. After that had dried out I then rubbed it back lightly with wet and dry and gave it another coat of blue. It now looked really good and shiny but as darkness fell, I switched on the light and noticed a new problem. Wibbly wobbly sides; even though the body now has no scratches, holes or dents in it, it is very uneven in parts. A matt primer really hides this but when you use a shiny top coat, the dips catch the light and make the whole thing look like hammered metal. Its not the finish I have been hoping to achieve.
Now a moral dilemma washes over me. Do I try and fix it or just cut corners and leave it as it is? I really wanted to start painting before the cold weather arrives and starts to bite but I know if I cut corners now, when the car is finished and the light bounces off it like one of those mirror balls in a night club, I wouldnt be happy. So it was now a question of asking the folks who know about these things and Uncle Frank, my 3-wheelers yahoo group and the Reliantchat yahoo group all came to the same conclusion ... I need to use a blocking technique. That is I need to spray the car with a high fill primer and then spray over that with a different colour - lets say black. Then using a large sander, sand off all the black. Where the black doesnt get removed, then thats a low spot and needs building up.
Sadly I know that to do the job properly and be happy with the end result, this is what I need to do. This means that painting the car is now put off until Im sure the body is as good as I can get it. In photos both the car and the door look fine and whilst the surface is really smooth now, if you saw the car up close in the sun and walked around it, you would see the sun sliding up and down the bodywork. It would not be something that I would be proud of.
Go to page 3
|